Webview API
Webview API 允許擴充套件在 Visual Studio Code 中建立完全可自定義的檢視。例如,內建的 Markdown 擴充套件使用 webview 來渲染 Markdown 預覽。Webview 還可以用於構建超出 VS Code 原生 API 支援範圍的複雜使用者介面。
將 webview 視為 VS Code 中的一個 iframe,由您的擴充套件控制。Webview 可以在此框架中渲染幾乎任何 HTML 內容,並使用訊息傳遞與擴充套件進行通訊。這種自由使得 webview 極其強大,並開啟了全新的擴充套件可能性。
Webview 在多個 VS Code API 中使用
- 使用
createWebviewPanel建立的 Webview 面板。在這種情況下,Webview 面板在 VS Code 中顯示為獨立的編輯器。這使得它們對於顯示自定義 UI 和自定義視覺化非常有用。 - 作為 自定義編輯器 的檢視。自定義編輯器允許擴充套件提供自定義 UI 來編輯工作區中的任何檔案。自定義編輯器 API 還允許您的擴充套件掛鉤到編輯器事件,如撤銷和重做,以及檔案事件,如儲存。
- 在顯示在側邊欄或面板區域的 Webview 檢視 中。有關更多詳細資訊,請參閱 webview 檢視示例擴充套件。
本頁重點介紹基本的 webview 面板 API,儘管這裡涵蓋的內容幾乎都適用於自定義編輯器和 webview 檢視中使用的 webview。即使您對那些 API 更感興趣,我們也建議先閱讀本頁以熟悉 webview 的基礎知識。
連結
VS Code API 用法
我應該使用 webview 嗎?
Webview 非常強大,但應該謹慎使用,並且僅在 VS Code 的原生 API 不足時使用。Webview 資源消耗大,並且執行在與普通擴充套件不同的上下文中。設計不佳的 webview 也容易在 VS Code 中顯得格格不入。
在使用 webview 之前,請考慮以下幾點
-
這個功能真的需要存在於 VS Code 中嗎?是否作為一個獨立的應用程式或網站更好?
-
webview 是實現功能的唯一方法嗎?您可以使用常規的 VS Code API 代替嗎?
-
您的 webview 是否能提供足夠的使用者價值,以證明其高資源消耗是合理的?
請記住:僅僅因為您可以使用 webview 做某事,並不意味著您應該這樣做。但是,如果您確信需要使用 webview,那麼本文件將為您提供幫助。讓我們開始吧。
Webview API 基礎知識
為了解釋 webview API,我們將構建一個名為“Cat Coding”的簡單擴充套件。此擴充套件將使用 webview 顯示一隻正在編寫程式碼(大概是在 VS Code 中)的貓的 gif。隨著我們對 API 的深入瞭解,我們將繼續為該擴充套件新增功能,包括一個計數器,用於跟蹤我們的貓已編寫的原始碼行數,以及在貓引入 bug 時通知使用者的通知。
這是 Cat Coding 擴充套件第一個版本的 package.json。您可以在此處找到示例應用的完整程式碼。我們擴充套件的第一個版本貢獻了一個命令,名為 catCoding.start。當用戶呼叫此命令時,我們將顯示一個帶有我們貓的簡單 webview。使用者可以從命令面板中將此命令作為Cat Coding: Start new cat coding session呼叫,甚至可以為其建立快捷鍵繫結。
{
  "name": "cat-coding",
  "description": "Cat Coding",
  "version": "0.0.1",
  "publisher": "bierner",
  "engines": {
    "vscode": "^1.74.0"
  },
  "activationEvents": [],
  "main": "./out/extension.js",
  "contributes": {
    "commands": [
      {
        "command": "catCoding.start",
        "title": "Start new cat coding session",
        "category": "Cat Coding"
      }
    ]
  },
  "scripts": {
    "vscode:prepublish": "tsc -p ./",
    "compile": "tsc -watch -p ./",
    "postinstall": "node ./node_modules/vscode/bin/install"
  },
  "dependencies": {
    "vscode": "*"
  },
  "devDependencies": {
    "@types/node": "^9.4.6",
    "typescript": "^2.8.3"
  }
}
注意:如果您的擴充套件針對的是 1.74 之前的 VS Code 版本,則必須在
activationEvents中顯式列出onCommand:catCoding.start。
現在讓我們實現 catCoding.start 命令。在我們的擴充套件主檔案中,我們註冊 catCoding.start 命令並使用它來顯示一個基本的 webview
import * as vscode from 'vscode';

export function activate(context: vscode.ExtensionContext) {
  context.subscriptions.push(
    vscode.commands.registerCommand('catCoding.start', () => {
      // Create and show a new webview
      const panel = vscode.window.createWebviewPanel(
        'catCoding', // Identifies the type of the webview. Used internally
        'Cat Coding', // Title of the panel displayed to the user
        vscode.ViewColumn.One, // Editor column to show the new webview panel in.
        {} // Webview options. More on these later.
      );
    })
  );
}
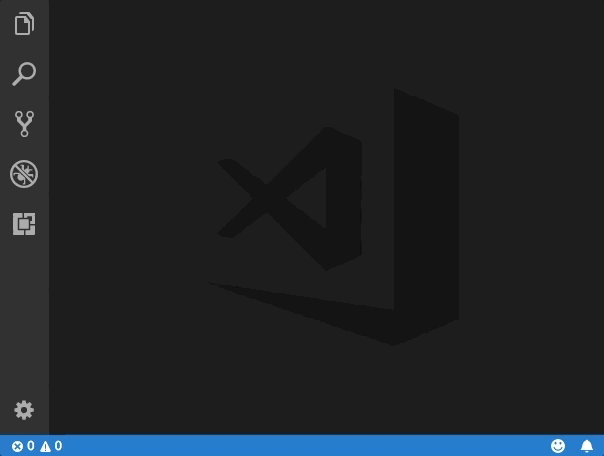
vscode.window.createWebviewPanel 函式會在編輯器中建立並顯示一個 webview。如果您嘗試運行當前狀態下的 catCoding.start 命令,您將看到以下內容
我們的命令會開啟一個具有正確標題的新 webview 面板,但沒有內容!要將我們的貓新增到新面板,我們還需要使用 webview.html 設定 webview 的 HTML 內容
import * as vscode from 'vscode';

export function activate(context: vscode.ExtensionContext) {
  context.subscriptions.push(
    vscode.commands.registerCommand('catCoding.start', () => {
      // Create and show panel
      const panel = vscode.window.createWebviewPanel(
        'catCoding',
        'Cat Coding',
        vscode.ViewColumn.One,
        {}
      );

      // And set its HTML content
      panel.webview.html = getWebviewContent();
    })
  );
}

function getWebviewContent() {
  return `<!DOCTYPE html>
<html lang="en">
<head>
    <meta charset="UTF-8">
    <meta name="viewport" content="width=device-width, initial-scale=1.0">
    <title>Cat Coding</title>
</head>
<body>
    <img src="https://media.giphy.com/media/JIX9t2j0ZTN9S/giphy.gif" width="300" />
</body>
</html>`;
}
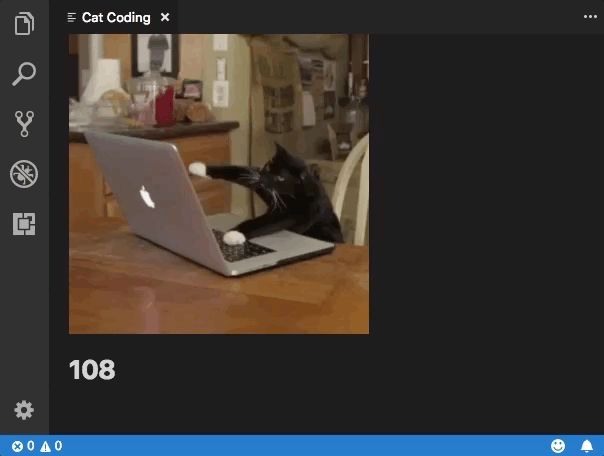
如果您再次執行命令,現在 webview 看起來是這樣的
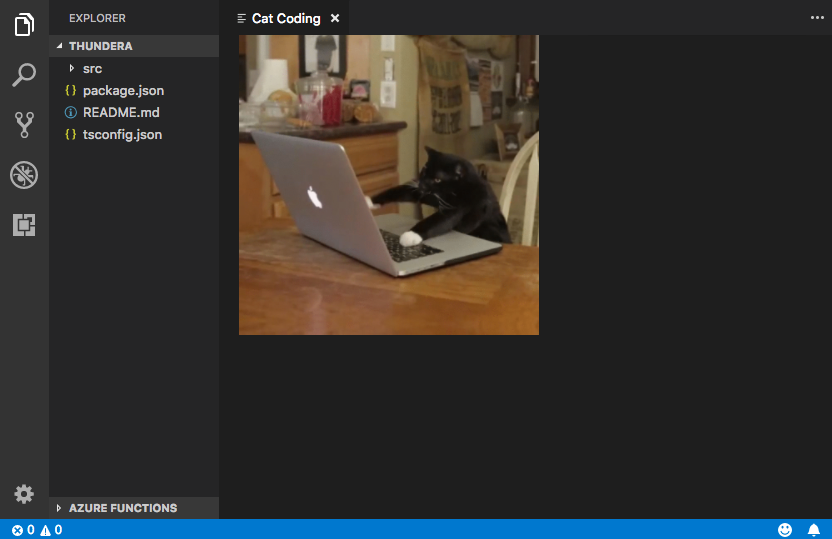
進展不錯!
webview.html 應始終是一個完整的 HTML 文件。HTML 片段或格式錯誤的 HTML 可能會導致意外行為。
更新 webview 內容
webview.html 也可以在建立後更新 webview 的內容。讓我們透過引入貓的輪換來使用此功能,使 Cat Coding 更加動態
import * as vscode from 'vscode';

const cats = {
  'Coding Cat': 'https://media.giphy.com/media/JIX9t2j0ZTN9S/giphy.gif',
  'Compiling Cat': 'https://media.giphy.com/media/mlvseq9yvZhba/giphy.gif'
};

export function activate(context: vscode.ExtensionContext) {
  context.subscriptions.push(
    vscode.commands.registerCommand('catCoding.start', () => {
      const panel = vscode.window.createWebviewPanel(
        'catCoding',
        'Cat Coding',
        vscode.ViewColumn.One,
        {}
      );

      let iteration = 0;
      const updateWebview = () => {
        const cat = iteration++ % 2 ? 'Compiling Cat' : 'Coding Cat';
        panel.title = cat;
        panel.webview.html = getWebviewContent(cat);
      };

      // Set initial content
      updateWebview();

      // And schedule updates to the content every second
      setInterval(updateWebview, 1000);
    })
  );
}

function getWebviewContent(cat: keyof typeof cats) {
  return `<!DOCTYPE html>
<html lang="en">
<head>
    <meta charset="UTF-8">
    <meta name="viewport" content="width=device-width, initial-scale=1.0">
    <title>Cat Coding</title>
</head>
<body>
    <img src="${cats[cat]}" width="300" />
</body>
</html>`;
}

設定 webview.html 會替換整個 webview 內容,類似於重新載入 iframe。在開始在 webview 中使用指令碼時,這一點很重要,因為它意味著設定 webview.html 也會重置指令碼的狀態。
上面的示例還使用 webview.title 來更改編輯器中顯示的文件標題。設定標題不會導致 webview 被重新載入。
生命週期
Webview 面板由建立它們的擴充套件擁有。擴充套件必須保留 createWebviewPanel 返回的 webview。如果您的擴充套件丟失了此引用,即使 webview 仍在 VS Code 中顯示,它也無法再次訪問該 webview。
與文字編輯器一樣,使用者也可以隨時關閉 webview 面板。當用戶關閉 webview 面板時,webview 本身將被銷燬。嘗試使用已銷燬的 webview 會引發異常。這意味著上面使用 setInterval 的示例實際上存在一個重要錯誤:如果使用者關閉面板,setInterval 將繼續觸發,它將嘗試更新 panel.webview.html,這當然會引發異常。貓討厭異常。讓我們來修復它!
當 webview 被銷燬時,會觸發 onDidDispose 事件。我們可以使用此事件來取消進一步的更新並清理 webview 的資源
import * as vscode from 'vscode';

const cats = {
  'Coding Cat': 'https://media.giphy.com/media/JIX9t2j0ZTN9S/giphy.gif',
  'Compiling Cat': 'https://media.giphy.com/media/mlvseq9yvZhba/giphy.gif'
};

export function activate(context: vscode.ExtensionContext) {
  context.subscriptions.push(
    vscode.commands.registerCommand('catCoding.start', () => {
      const panel = vscode.window.createWebviewPanel(
        'catCoding',
        'Cat Coding',
        vscode.ViewColumn.One,
        {}
      );

      let iteration = 0;
      const updateWebview = () => {
        const cat = iteration++ % 2 ? 'Compiling Cat' : 'Coding Cat';
        panel.title = cat;
        panel.webview.html = getWebviewContent(cat);
      };

      updateWebview();
      const interval = setInterval(updateWebview, 1000);

      panel.onDidDispose(
        () => {
          // When the panel is closed, cancel any future updates to the webview content
          clearInterval(interval);
        },
        null,
        context.subscriptions
      );
    })
  );
}
擴充套件還可以透過呼叫 webview 上的 dispose() 來以程式設計方式關閉 webview。例如,如果我們想將貓的工作時間限制為五秒
export function activate(context: vscode.ExtensionContext) {
  context.subscriptions.push(
    vscode.commands.registerCommand('catCoding.start', () => {
      const panel = vscode.window.createWebviewPanel(
        'catCoding',
        'Cat Coding',
        vscode.ViewColumn.One,
        {}
      );

      panel.webview.html = getWebviewContent('Coding Cat');

      // After 5sec, programmatically close the webview panel
      const timeout = setTimeout(() => panel.dispose(), 5000);

      panel.onDidDispose(
        () => {
          // Handle user closing panel before the 5sec have passed
          clearTimeout(timeout);
        },
        null,
        context.subscriptions
      );
    })
  );
}
可見性和移動
當 webview 面板移到後臺標籤頁時,它會變得隱藏。但它不會被銷燬。當面板再次恢復到前臺時,VS Code 將自動從 webview.html 恢復 webview 的內容

.visible 屬性告訴您 webview 面板當前是否可見。
擴充套件可以透過呼叫 reveal() 以程式設計方式將 webview 面板帶到前臺。此方法接受一個可選的目標檢視列來顯示面板。一個 webview 面板一次只能顯示在一個編輯器列中。呼叫 reveal() 或將 webview 面板拖到新的編輯器列會將 webview 移到該新列中。
讓我們更新我們的擴充套件,使其一次只允許存在一個 webview。如果面板在後臺,則 catCoding.start 命令會將其帶到前臺
export function activate(context: vscode.ExtensionContext) {
  // Track the current panel with a webview
  let currentPanel: vscode.WebviewPanel | undefined = undefined;

  context.subscriptions.push(
    vscode.commands.registerCommand('catCoding.start', () => {
      const columnToShowIn = vscode.window.activeTextEditor
        ? vscode.window.activeTextEditor.viewColumn
        : undefined;

      if (currentPanel) {
        // If we already have a panel, show it in the target column
        currentPanel.reveal(columnToShowIn);
      } else {
        // Otherwise, create a new panel
        currentPanel = vscode.window.createWebviewPanel(
          'catCoding',
          'Cat Coding',
          columnToShowIn || vscode.ViewColumn.One,
          {}
        );
        currentPanel.webview.html = getWebviewContent('Coding Cat');

        // Reset when the current panel is closed
        currentPanel.onDidDispose(
          () => {
            currentPanel = undefined;
          },
          null,
          context.subscriptions
        );
      }
    })
  );
}
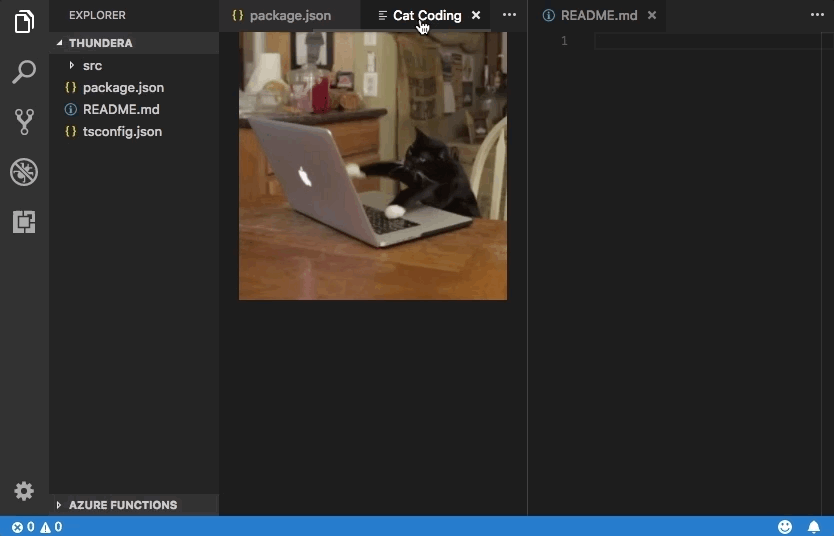
這是新擴充套件在實際使用中的效果

每當 webview 的可見性發生變化,或者當 webview 被移到新列時,都會觸發 onDidChangeViewState 事件。我們的擴充套件可以使用此事件根據 webview 顯示的列來更改貓。
const cats = {
  'Coding Cat': 'https://media.giphy.com/media/JIX9t2j0ZTN9S/giphy.gif',
  'Compiling Cat': 'https://media.giphy.com/media/mlvseq9yvZhba/giphy.gif',
  'Testing Cat': 'https://media.giphy.com/media/3oriO0OEd9QIDdllqo/giphy.gif'
};

export function activate(context: vscode.ExtensionContext) {
  context.subscriptions.push(
    vscode.commands.registerCommand('catCoding.start', () => {
      const panel = vscode.window.createWebviewPanel(
        'catCoding',
        'Cat Coding',
        vscode.ViewColumn.One,
        {}
      );
      panel.webview.html = getWebviewContent('Coding Cat');

      // Update contents based on view state changes
      panel.onDidChangeViewState(
        e => {
          const panel = e.webviewPanel;
          switch (panel.viewColumn) {
            case vscode.ViewColumn.One:
              updateWebviewForCat(panel, 'Coding Cat');
              return;

            case vscode.ViewColumn.Two:
              updateWebviewForCat(panel, 'Compiling Cat');
              return;

            case vscode.ViewColumn.Three:
              updateWebviewForCat(panel, 'Testing Cat');
              return;
          }
        },
        null,
        context.subscriptions
      );
    })
  );
}

function updateWebviewForCat(panel: vscode.WebviewPanel, catName: keyof typeof cats) {
  panel.title = catName;
  panel.webview.html = getWebviewContent(catName);
}
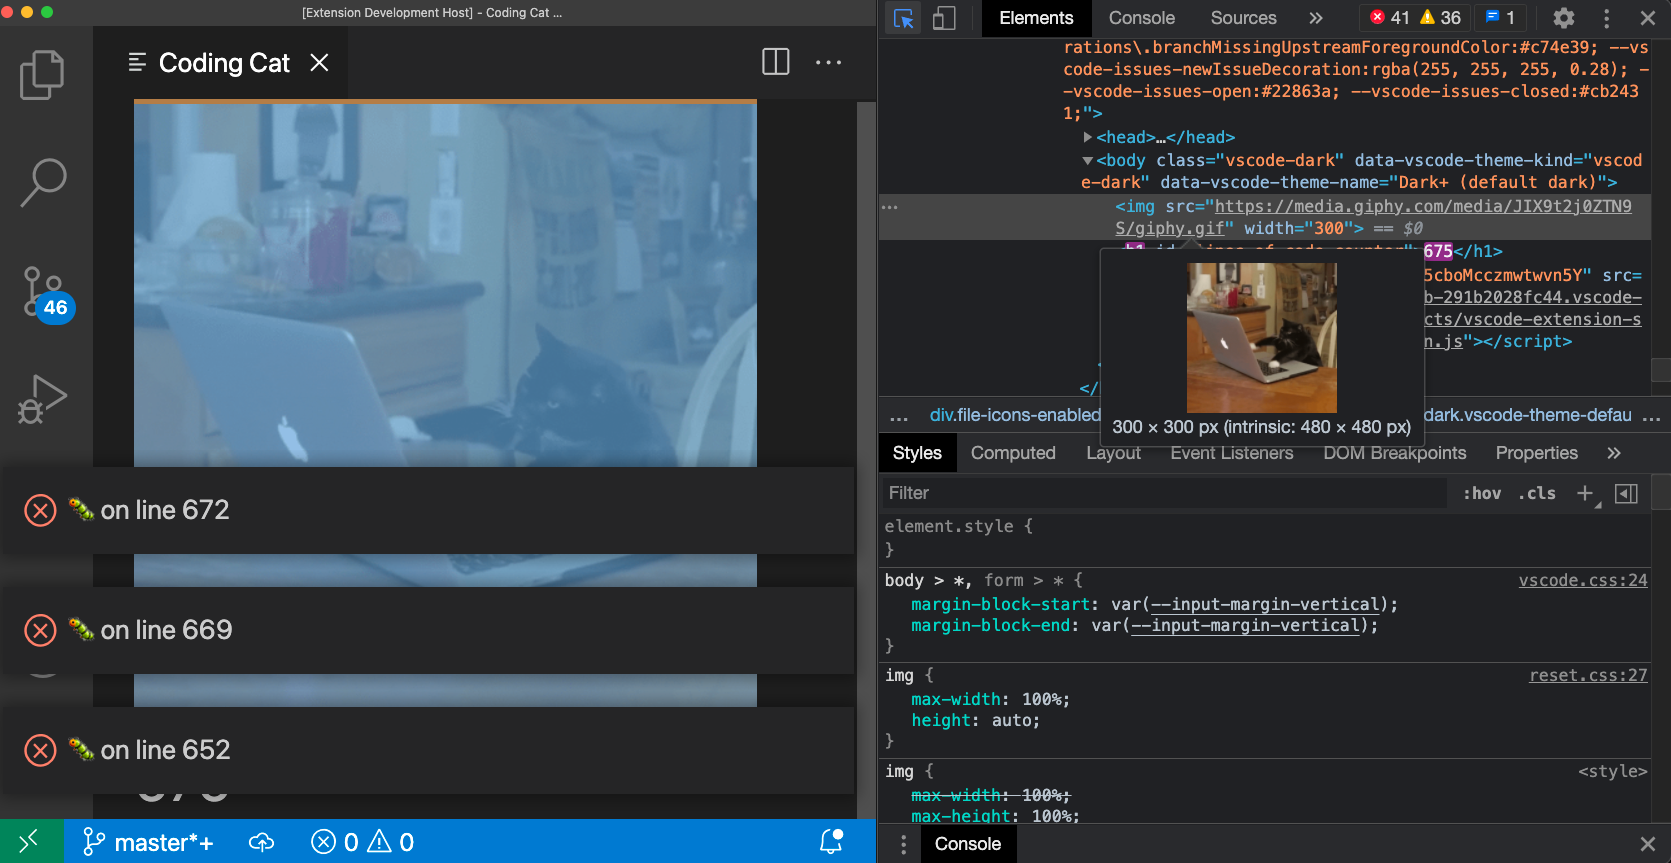
檢查和除錯 webview
Developer: Toggle Developer Tools 命令會開啟一個 開發者工具視窗,您可以使用它來除錯和檢查您的 webview。
請注意,如果您使用的是早於 1.56 版本的 VS Code,或者您正在嘗試除錯一個設定了 enableFindWidget 的 webview,則必須改用 Developer: Open Webview Developer Tools 命令。此命令會為每個 webview 開啟一個專用的開發者工具頁面,而不是使用一個由所有 webview 和編輯器本身共享的開發者工具頁面。
從開發者工具中,您可以使用位於開發者工具視窗左上角的檢查工具開始檢查 webview 的內容
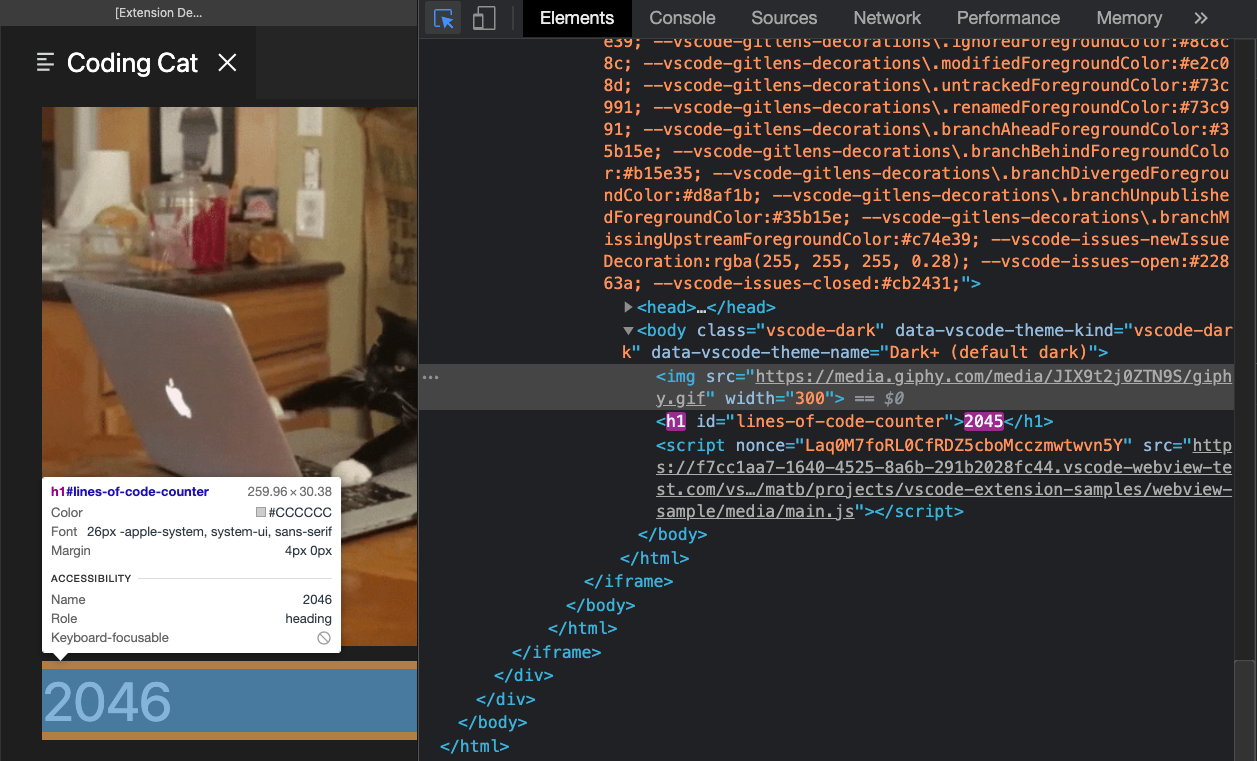
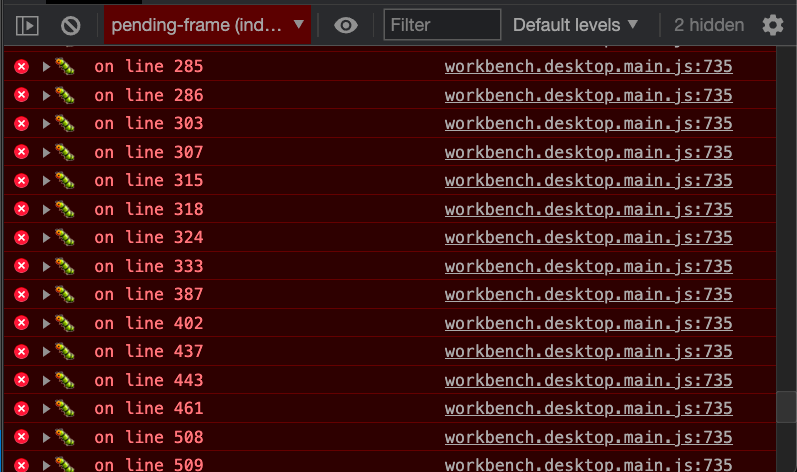
您還可以檢視開發者工具控制檯中的 webview 的所有錯誤和日誌
要在 webview 的上下文中評估表示式,請確保從開發者工具控制檯面板左上角的下拉選單中選擇活動幀環境
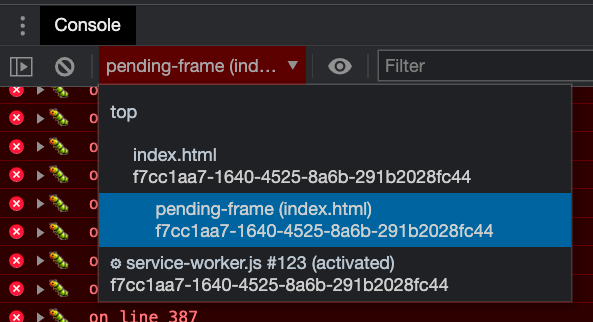
活動幀環境是 webview 指令碼本身執行的地方。
此外,Developer: Reload Webview 命令會重新載入所有活動的 webview。如果您需要重置 webview 的狀態,或者磁碟上的一些 webview 內容已更改並希望載入新內容,這會很有幫助。
載入本地內容
Webview 在隔離的上下文中執行,無法直接訪問本地資源。這是出於安全原因。這意味著,為了載入擴充套件中的影像、樣式表和其他資源,或載入使用者當前工作區中的任何內容,您必須使用 Webview.asWebviewUri 函式將本地 file: URI 轉換為 VS Code 可以用來載入部分本地資源的特殊 URI。
設想一下,我們想將貓的 gif 圖打包到我們的擴充套件中,而不是從 Giphy 獲取。為此,我們首先建立一個指向磁碟上檔案的 URI,然後將這些 URI 透過 asWebviewUri 函式傳遞
import * as vscode from 'vscode';

export function activate(context: vscode.ExtensionContext) {
  context.subscriptions.push(
    vscode.commands.registerCommand('catCoding.start', () => {
      const panel = vscode.window.createWebviewPanel(
        'catCoding',
        'Cat Coding',
        vscode.ViewColumn.One,
        {}
      );

      // Get path to resource on disk
      const onDiskPath = vscode.Uri.joinPath(context.extensionUri, 'media', 'cat.gif');

      // And get the special URI to use with the webview
      const catGifSrc = panel.webview.asWebviewUri(onDiskPath);

      panel.webview.html = getWebviewContent(catGifSrc);
    })
  );
}

function getWebviewContent(catGifSrc: vscode.Uri) {
  return `<!DOCTYPE html>
<html lang="en">
<head>
    <meta charset="UTF-8">
    <meta name="viewport" content="width=device-width, initial-scale=1.0">
    <title>Cat Coding</title>
</head>
<body>
    <img src="${catGifSrc}" width="300" />
</body>
</html>`;
}
如果除錯此程式碼,我們會看到 catGifSrc 的實際值類似於
vscode-resource:/Users/toonces/projects/vscode-cat-coding/media/cat.gif
VS Code 理解這個特殊的 URI,並將使用它從磁碟載入我們的 gif!
預設情況下,webview 只能訪問以下位置的資源
- 在您的擴充套件安裝目錄內。
- 在使用者當前活動的工作區內。
使用 WebviewOptions.localResourceRoots 允許訪問其他本地資源。
您始終可以使用資料 URI 將資源直接嵌入到 webview 中。
控制對本地資源的訪問
Webview 可以使用 localResourceRoots 選項控制可以從使用者計算機載入哪些資源。localResourceRoots 定義了一組可以載入本地內容的根 URI。
我們可以使用 localResourceRoots 將 Cat Coding webview 限制為僅從我們擴充套件中的 media 目錄載入資源
import * as vscode from 'vscode';

export function activate(context: vscode.ExtensionContext) {
  context.subscriptions.push(
    vscode.commands.registerCommand('catCoding.start', () => {
      const panel = vscode.window.createWebviewPanel(
        'catCoding',
        'Cat Coding',
        vscode.ViewColumn.One,
        {
          // Only allow the webview to access resources in our extension's media directory
          localResourceRoots: [vscode.Uri.joinPath(context.extensionUri, 'media')]
        }
      );

      const onDiskPath = vscode.Uri.joinPath(context.extensionUri, 'media', 'cat.gif');
      const catGifSrc = panel.webview.asWebviewUri(onDiskPath);

      panel.webview.html = getWebviewContent(catGifSrc);
    })
  );
}
要禁止所有本地資源,只需將 localResourceRoots 設定為 []。
總的來說,webview 在載入本地資源時應儘可能受限制。但是,請記住,localResourceRoots 本身並不提供完整的安全保護。確保您的 webview 還遵循 安全最佳實踐,並新增 內容安全策略 以進一步限制可載入的內容。
主題化 webview 內容
Webview 可以使用 CSS 根據 VS Code 的當前主題更改其外觀。VS Code 將主題分為三類,並在 body 元素中新增一個特殊類來指示當前主題
vscode-light- 淺色主題。vscode-dark- 深色主題。vscode-high-contrast- 高對比度主題。
以下 CSS 根據使用者當前的主題更改 webview 的文字顏色
body.vscode-light {
  color: black;
}

body.vscode-dark {
  color: white;
}

body.vscode-high-contrast {
  color: red;
}
在開發 webview 應用程式時,請確保它適用於這三種主題。並且務必在高對比度模式下測試您的 webview,以確保視障人士能夠使用它。
Webview 還可以使用 CSS 變數 訪問 VS Code 主題顏色。這些變數名以 vscode 開頭,並將 . 替換為 -。例如,editor.foreground 變為 var(--vscode-editor-foreground)
code {
  color: var(--vscode-editor-foreground);
}
有關可用主題變數,請參閱 主題顏色參考。有一個擴充套件提供了變數的 IntelliSense 建議。
以下字型相關變數也已定義
--vscode-editor-font-family- 編輯器字體系列(來自editor.fontFamily設定)。--vscode-editor-font-weight- 編輯器字型粗細(來自editor.fontWeight設定)。--vscode-editor-font-size- 編輯器字型大小(來自editor.fontSize設定)。
最後,對於需要編寫針對單個主題的 CSS 的特殊情況,webview 的 body 元素有一個名為 vscode-theme-id 的資料屬性,該屬性儲存當前活動主題的 ID。這允許您為 webview 編寫特定於主題的 CSS
body[data-vscode-theme-id="One Dark Pro"] {
    background: hotpink;
}
支援的媒體格式
Webview 支援音訊和影片,但並非所有媒體編解碼器或媒體檔案容器型別都受支援。
以下音訊格式可在 Webview 中使用
- Wav
- Mp3
- Ogg
- Flac
以下影片格式可在 webview 中使用
- H.264
- VP8
對於影片檔案,請確保影片和音訊軌道都支援媒體格式。例如,許多 .mp4 檔案使用 H.264 進行影片編碼和 AAC 音訊編碼。VS Code 將能夠播放 mp4 的影片部分,但由於不支援 AAC 音訊,因此不會有聲音。相反,您需要為音訊軌道使用 mp3。
上下文選單
高階 webview 可以自定義使用者在 webview 中右鍵單擊時顯示的上下文選單。這可以透過貢獻點來實現,與 VS Code 的普通上下文選單類似,因此自定義選單能很好地融入編輯器的其餘部分。Webview 還可以為 webview 的不同部分顯示自定義上下文選單。
要向您的 webview 新增新的上下文選單項,請首先在 menus 下的新 webview/context 部分新增一個新條目。每個貢獻都包含一個 command(其標題也來自此處)和一個 when 子句。when 子句應包含 webviewId == 'YOUR_WEBVIEW_VIEW_TYPE' 以確保上下文選單僅適用於您擴充套件的 webview
"contributes": {
  "menus": {
    "webview/context": [
      {
        "command": "catCoding.yarn",
        "when": "webviewId == 'catCoding'"
      },
      {
        "command": "catCoding.insertLion",
        "when": "webviewId == 'catCoding' && webviewSection == 'editor'"
      }
    ]
  },
  "commands": [
    {
      "command": "catCoding.yarn",
      "title": "Yarn 🧶",
      "category": "Cat Coding"
    },
    {
      "command": "catCoding.insertLion",
      "title": "Insert 🦁",
      "category": "Cat Coding"
    },
    ...
  ]
}
在 webview 內部,您還可以使用 data-vscode-context 資料屬性(或在 JavaScript 中使用 dataset.vscodeContext)設定 HTML 特定區域的上下文。data-vscode-context 值是一個 JSON 物件,它指定當使用者右鍵單擊元素時要設定的上下文。最終上下文是從文件根到單擊的元素確定的。
例如,考慮以下 HTML
<div class="main" data-vscode-context='{"webviewSection": "main", "mouseCount": 4}'>
  <h1>Cat Coding</h1>

  <textarea data-vscode-context='{"webviewSection": "editor", "preventDefaultContextMenuItems": true}'></textarea>
</div>
如果使用者右鍵單擊 textarea,將設定以下上下文
webviewSection == 'editor'- 此項覆蓋父元素的webviewSection。mouseCount == 4- 此項繼承自父元素。preventDefaultContextMenuItems == true- 這是一個特殊上下文,可隱藏 VS Code 通常新增到 webview 上下文選單的複製和貼上條目。
如果使用者在 <textarea> 內右鍵單擊,他們將看到
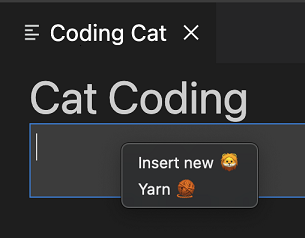
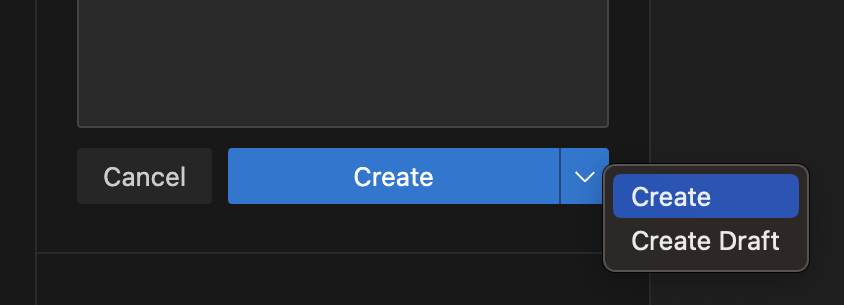
有時在左鍵/主鍵單擊時顯示選單很有用。例如,要顯示一個拆分按鈕上的選單。您可以透過在 onClick 事件中排程 contextmenu 事件來執行此操作
<button data-vscode-context='{"preventDefaultContextMenuItems": true }' onClick='((e) => {
        e.preventDefault();
        e.target.dispatchEvent(new MouseEvent("contextmenu", { bubbles: true, clientX: e.clientX, clientY: e.clientY }));
        e.stopPropagation();
    })(event)'>Create</button>
指令碼和訊息傳遞
Webview 就像 iframe 一樣,這意味著它們也可以執行指令碼。JavaScript 預設在 webview 中停用,但可以透過傳遞 enableScripts: true 選項輕鬆重新啟用。
讓我們使用指令碼新增一個計數器來跟蹤我們的貓已編寫的原始碼行數。執行基本指令碼非常簡單,但請注意,此示例僅用於演示目的。實際上,您的 webview 應始終使用內容安全策略停用內聯指令碼
import * as path from 'path';
import * as vscode from 'vscode';

export function activate(context: vscode.ExtensionContext) {
  context.subscriptions.push(
    vscode.commands.registerCommand('catCoding.start', () => {
      const panel = vscode.window.createWebviewPanel(
        'catCoding',
        'Cat Coding',
        vscode.ViewColumn.One,
        {
          // Enable scripts in the webview
          enableScripts: true
        }
      );

      panel.webview.html = getWebviewContent();
    })
  );
}

function getWebviewContent() {
  return `<!DOCTYPE html>
<html lang="en">
<head>
    <meta charset="UTF-8">
    <meta name="viewport" content="width=device-width, initial-scale=1.0">
    <title>Cat Coding</title>
</head>
<body>
    <img src="https://media.giphy.com/media/JIX9t2j0ZTN9S/giphy.gif" width="300" />
    <h1 id="lines-of-code-counter">0</h1>

    <script>
        const counter = document.getElementById('lines-of-code-counter');

        let count = 0;
        setInterval(() => {
            counter.textContent = count++;
        }, 100);
    </script>
</body>
</html>`;
}
哇!一隻非常有生產力的貓。
Webview 指令碼幾乎可以執行普通網頁上的任何指令碼可以執行的操作。但請記住,webview 存在於自己的上下文中,因此 webview 中的指令碼無法訪問 VS Code API。訊息傳遞就是為此而生的!
將訊息從擴充套件傳遞到 webview
擴充套件可以使用 webview.postMessage() 將資料傳送到其 webview。此方法將任何 JSON 可序列化的資料傳送到 webview。訊息透過標準的 message 事件在 webview 內部接收。
為了演示這一點,讓我們為 Cat Coding 新增一個新命令,指示當前正在編碼的貓重構他們的程式碼(從而減少總行數)。新命令 catCoding.doRefactor 使用 postMessage 將指令傳送到當前 webview,並在 webview 內部使用 window.addEventListener('message', event => { ... }) 來處理訊息
export function activate(context: vscode.ExtensionContext) {
  // Only allow a single Cat Coder
  let currentPanel: vscode.WebviewPanel | undefined = undefined;

  context.subscriptions.push(
    vscode.commands.registerCommand('catCoding.start', () => {
      if (currentPanel) {
        currentPanel.reveal(vscode.ViewColumn.One);
      } else {
        currentPanel = vscode.window.createWebviewPanel(
          'catCoding',
          'Cat Coding',
          vscode.ViewColumn.One,
          {
            enableScripts: true
          }
        );
        currentPanel.webview.html = getWebviewContent();
        currentPanel.onDidDispose(
          () => {
            currentPanel = undefined;
          },
          undefined,
          context.subscriptions
        );
      }
    })
  );

  // Our new command
  context.subscriptions.push(
    vscode.commands.registerCommand('catCoding.doRefactor', () => {
      if (!currentPanel) {
        return;
      }

      // Send a message to our webview.
      // You can send any JSON serializable data.
      currentPanel.webview.postMessage({ command: 'refactor' });
    })
  );
}

function getWebviewContent() {
  return `<!DOCTYPE html>
<html lang="en">
<head>
    <meta charset="UTF-8">
    <meta name="viewport" content="width=device-width, initial-scale=1.0">
    <title>Cat Coding</title>
</head>
<body>
    <img src="https://media.giphy.com/media/JIX9t2j0ZTN9S/giphy.gif" width="300" />
    <h1 id="lines-of-code-counter">0</h1>

    <script>
        const counter = document.getElementById('lines-of-code-counter');

        let count = 0;
        setInterval(() => {
            counter.textContent = count++;
        }, 100);

        // Handle the message inside the webview
        window.addEventListener('message', event => {

            const message = event.data; // The JSON data our extension sent

            switch (message.command) {
                case 'refactor':
                    count = Math.ceil(count * 0.5);
                    counter.textContent = count;
                    break;
            }
        });
    </script>
</body>
</html>`;
}
將訊息從 webview 傳遞到擴充套件
Webview 也可以將訊息傳遞迴其擴充套件。這透過 webview 內部一個特殊的 VS Code API 物件上的 postMessage 函式來實現。要訪問 VS Code API 物件,請在 webview 中呼叫 acquireVsCodeApi。此函式每個會話只能呼叫一次。您必須保留此方法返回的 VS Code API 例項,並將其分發給任何需要使用它的其他函式。
我們可以在 Cat Coding webview 中使用 VS Code API 和 postMessage,在貓在程式碼中引入 bug 時通知擴充套件
export function activate(context: vscode.ExtensionContext) {
  context.subscriptions.push(
    vscode.commands.registerCommand('catCoding.start', () => {
      const panel = vscode.window.createWebviewPanel(
        'catCoding',
        'Cat Coding',
        vscode.ViewColumn.One,
        {
          enableScripts: true
        }
      );

      panel.webview.html = getWebviewContent();

      // Handle messages from the webview
      panel.webview.onDidReceiveMessage(
        message => {
          switch (message.command) {
            case 'alert':
              vscode.window.showErrorMessage(message.text);
              return;
          }
        },
        undefined,
        context.subscriptions
      );
    })
  );
}

function getWebviewContent() {
  return `<!DOCTYPE html>
<html lang="en">
<head>
    <meta charset="UTF-8">
    <meta name="viewport" content="width=device-width, initial-scale=1.0">
    <title>Cat Coding</title>
</head>
<body>
    <img src="https://media.giphy.com/media/JIX9t2j0ZTN9S/giphy.gif" width="300" />
    <h1 id="lines-of-code-counter">0</h1>

    <script>
        (function() {
            const vscode = acquireVsCodeApi();
            const counter = document.getElementById('lines-of-code-counter');

            let count = 0;
            setInterval(() => {
                counter.textContent = count++;

                // Alert the extension when our cat introduces a bug
                if (Math.random() < 0.001 * count) {
                    vscode.postMessage({
                        command: 'alert',
                        text: '🐛  on line ' + count
                    })
                }
            }, 100);
        }())
    </script>
</body>
</html>`;
}

出於安全原因,您必須將 VS Code API 物件保密,並確保它永遠不會洩露到全域性作用域。
使用 Web Workers
Webview 支援 Web Workers,但有幾個重要的限制需要注意。
首先,worker 只能使用 data: 或 blob: URI 載入。您不能直接從擴充套件資料夾載入 worker。
如果您確實需要從擴充套件中的 JavaScript 檔案載入 worker 程式碼,請嘗試使用 fetch
const workerSource = 'absolute/path/to/worker.js';

fetch(workerSource)
  .then(result => result.blob())
  .then(blob => {
    const blobUrl = URL.createObjectURL(blob);
    new Worker(blobUrl);
  });
Worker 指令碼也不支援使用 importScripts 或 import(...) 匯入原始碼。如果您的 worker 動態載入程式碼,請嘗試使用像 webpack 這樣的打包器將 worker 指令碼打包到單個檔案中。
使用 webpack,您可以使用 LimitChunkCountPlugin 來強制編譯後的 worker JavaScript 成為單個檔案
const path = require('path');
const webpack = require('webpack');

module.exports = {
  target: 'webworker',
  entry: './worker/src/index.js',
  output: {
    filename: 'worker.js',
    path: path.resolve(__dirname, 'media')
  },
  plugins: [
    new webpack.optimize.LimitChunkCountPlugin({
      maxChunks: 1
    })
  ]
};
安全性
與任何網頁一樣,建立 webview 時,您必須遵循一些基本安全最佳實踐。
限制功能
Webview 應具有所需的最低能力集。例如,如果您的 webview 不需要執行指令碼,則不要設定 enableScripts: true。如果您的 webview 不需要從使用者工作區載入資源,請將 localResourceRoots 設定為 [vscode.Uri.file(extensionContext.extensionPath)],甚至設定為 [] 來禁止訪問所有本地資源。
內容安全策略
內容安全策略進一步限制了可在 webview 中載入和執行的內容。例如,內容安全策略可以確保只允許列表中允許的指令碼在 webview 中執行,甚至可以告訴 webview 只通過 https 載入影像。
要新增內容安全策略,請在 webview 的 <head> 頂部放置一個 <meta http-equiv="Content-Security-Policy"> 指令
function getWebviewContent() {
  return `<!DOCTYPE html>
<html lang="en">
<head>
    <meta charset="UTF-8">

    <meta http-equiv="Content-Security-Policy" content="default-src 'none';">

    <meta name="viewport" content="width=device-width, initial-scale=1.0">

    <title>Cat Coding</title>
</head>
<body>
    ...
</body>
</html>`;
}
default-src 'none'; 策略禁止所有內容。然後,我們可以重新啟用擴充套件執行所需的最低限度的內容。這是一個允許載入本地指令碼和樣式表,以及透過 https 載入影像的內容安全策略
<meta
  http-equiv="Content-Security-Policy"
  content="default-src 'none'; img-src ${webview.cspSource} https:; script-src ${webview.cspSource}; style-src ${webview.cspSource};"
/>
${webview.cspSource} 值是來自 webview 物件本身的佔位符。有關如何使用此值的完整示例,請參閱 webview 示例。
此內容安全策略還隱式停用了內聯指令碼和樣式。最好將所有內聯樣式和指令碼提取到外部檔案中,以便它們可以被正確載入而不放鬆內容安全策略。
僅透過 https 載入內容
如果您的 webview 允許載入外部資源,強烈建議您僅允許透過 https 而不是 http 載入這些資源。上面的示例內容安全策略已透過只允許透過 https: 載入影像來實現此目的。
對所有使用者輸入進行消毒
與普通網頁一樣,在構建 webview 的 HTML 時,您必須對所有使用者輸入進行消毒。未能正確消毒輸入可能會導致內容注入,從而可能使您的使用者面臨安全風險。
需要消毒的示例值
- 檔案內容。
- 檔案和資料夾路徑。
- 使用者和工作區設定。
考慮使用輔助庫來構建 HTML 字串,或至少確保使用者工作區中的所有內容都經過適當的消毒。
切勿僅依靠消毒來保證安全。請務必遵循其他安全最佳實踐,例如擁有內容安全策略以最小化任何潛在內容注入的影響。
持久化
在標準的 webview 生命週期中,webview 由 createWebviewPanel 建立,並在使用者關閉它們或呼叫 .dispose() 時銷燬。然而,webview 的內容在 webview 變得可見時建立,在 webview 移到後臺時銷燬。webview 中的任何狀態都會在 webview 被移到後臺選項卡時丟失。
解決此問題的最佳方法是使您的 webview 無狀態。使用訊息傳遞來儲存 webview 的狀態,然後在 webview 再次變得可見時恢復狀態。
getState 和 setState
在 webview 中執行的指令碼可以使用 getState 和 setState 方法來儲存和恢復 JSON 可序列化的狀態物件。即使 webview 面板隱藏時 webview 內容本身被銷燬,此狀態也會被保留。當 webview 面板被銷燬時,狀態也會被銷燬。
// Inside a webview script
const vscode = acquireVsCodeApi();

const counter = document.getElementById('lines-of-code-counter');

// Check if we have an old state to restore from
const previousState = vscode.getState();
let count = previousState ? previousState.count : 0;
counter.textContent = count;

setInterval(() => {
  counter.textContent = count++;
  // Update the saved state
  vscode.setState({ count });
}, 100);
getState 和 setState 是持久化狀態的首選方法,因為它們的效能開銷遠低於 retainContextWhenHidden。
序列化
透過實現 WebviewPanelSerializer,您的 webview 可以在 VS Code 重啟時自動恢復。序列化建立在 getState 和 setState 的基礎上,並且只有當您的擴充套件為您的 webview 註冊了 WebviewPanelSerializer 時才啟用。
為了使我們的編碼貓在 VS Code 重啟後仍能持久化,請首先在擴充套件的 package.json 中為 onWebviewPanel 新增一個啟用事件
"activationEvents": [
    ...,
    "onWebviewPanel:catCoding"
]
此啟用事件確保在 VS Code 需要恢復具有 catCoding 檢視型別(viewType)的 webview 時,我們的擴充套件將被啟用。
然後,在我們的擴充套件的 activate 方法中,呼叫 registerWebviewPanelSerializer 來註冊一個新的 WebviewPanelSerializer。WebviewPanelSerializer 負責從其持久化狀態恢復 webview 的內容。此狀態是 webview 內容使用 setState 設定的 JSON 塊。
export function activate(context: vscode.ExtensionContext) {
  // Normal setup...

  // And make sure we register a serializer for our webview type
  vscode.window.registerWebviewPanelSerializer('catCoding', new CatCodingSerializer());
}

class CatCodingSerializer implements vscode.WebviewPanelSerializer {
  async deserializeWebviewPanel(webviewPanel: vscode.WebviewPanel, state: any) {
    // `state` is the state persisted using `setState` inside the webview
    console.log(`Got state: ${state}`);

    // Restore the content of our webview.
    //
    // Make sure we hold on to the `webviewPanel` passed in here and
    // also restore any event listeners we need on it.
    webviewPanel.webview.html = getWebviewContent();
  }
}
現在,如果您在開啟 cat coding 面板的情況下重新啟動 VS Code,該面板將在相同的位置自動恢復。
retainContextWhenHidden
對於具有非常複雜 UI 或無法快速儲存和恢復的狀態的 webview,您可以使用 retainContextWhenHidden 選項。此選項使 webview 在隱藏時保留其內容,即使 webview 本身不再處於前臺。
雖然 Cat Coding 幾乎不能說有複雜的狀態,但讓我們嘗試啟用 retainContextWhenHidden 來看看該選項如何改變 webview 的行為
import * as vscode from 'vscode';

export function activate(context: vscode.ExtensionContext) {
  context.subscriptions.push(
    vscode.commands.registerCommand('catCoding.start', () => {
      const panel = vscode.window.createWebviewPanel(
        'catCoding',
        'Cat Coding',
        vscode.ViewColumn.One,
        {
          enableScripts: true,
          retainContextWhenHidden: true
        }
      );
      panel.webview.html = getWebviewContent();
    })
  );
}

function getWebviewContent() {
  return `<!DOCTYPE html>
<html lang="en">
<head>
    <meta charset="UTF-8">
    <meta name="viewport" content="width=device-width, initial-scale=1.0">
    <title>Cat Coding</title>
</head>
<body>
    <img src="https://media.giphy.com/media/JIX9t2j0ZTN9S/giphy.gif" width="300" />
    <h1 id="lines-of-code-counter">0</h1>

    <script>
        const counter = document.getElementById('lines-of-code-counter');

        let count = 0;
        setInterval(() => {
            counter.textContent = count++;
        }, 100);
    </script>
</body>
</html>`;
}
請注意,當 webview 被隱藏然後恢復時,計數器不會重置。無需額外程式碼!使用 retainContextWhenHidden,webview 的行為類似於 Web 瀏覽器中的後臺標籤頁。指令碼和其他動態內容即使在標籤頁不活動或不可見時也會繼續執行。當啟用 retainContextWhenHidden 時,您還可以向隱藏的 webview 傳送訊息。
儘管 retainContextWhenHidden 可能很有吸引力,但請記住,它具有很高的記憶體開銷,並且僅在其他持久化技術無法奏效時才應使用。
輔助功能
在使用者使用螢幕閱讀器操作 VS Code 的上下文中,類 vscode-using-screen-reader 將新增到 webview 的主 body 中。此外,在使用者選擇減少視窗中動效偏好的情況下,類 vscode-reduce-motion 將新增到文件的主 body 元素中。透過觀察這些類並相應地調整渲染,您的 webview 內容可以更好地反映使用者的偏好。
後續步驟
如果您想了解更多關於 VS Code 可擴充套件性的資訊,請嘗試以下主題